Function Room Policy
When users click the Policy hyperlink in the Function Rooms section, they are navigated to the Function Room Policy screen. The following tabs are displayed in this screen:
-
Inventory Blocks
-
Cancellation Policy
Inventory Blocks
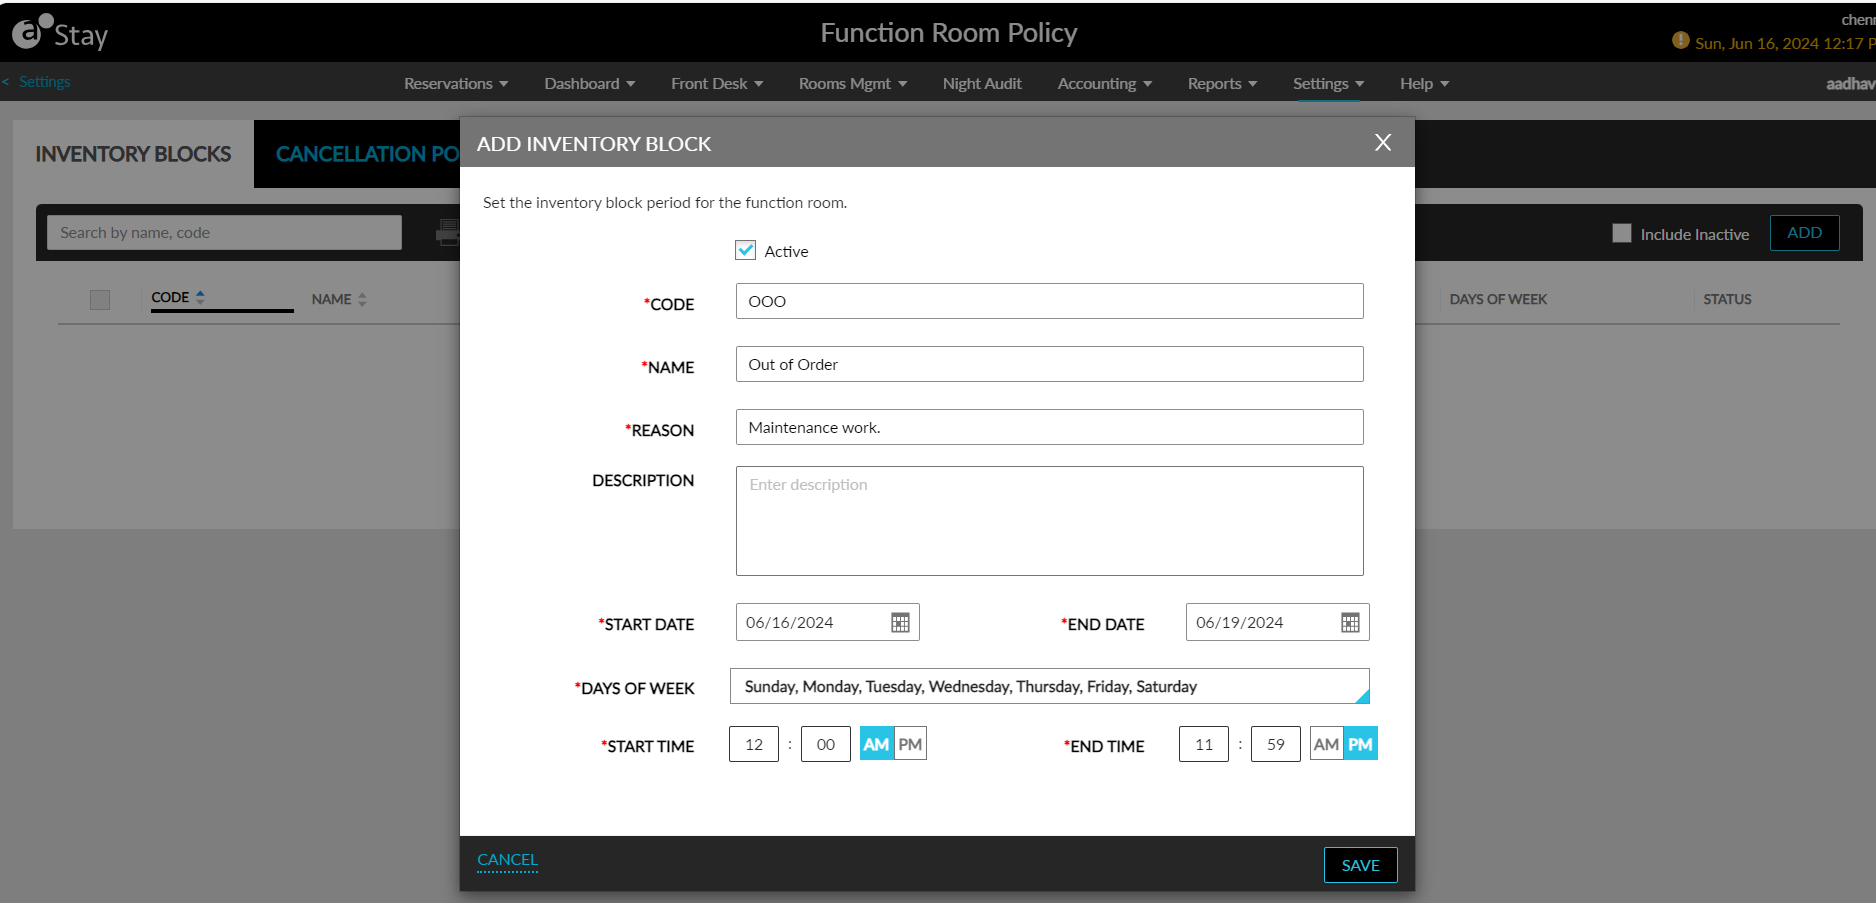
Users can configure inventory blocks for function rooms from this tab. When users click Add, the Add Inventory Block pop-up screen appears that displays the following fields.
|
Field |
Description |
|---|---|
|
Active |
Select the checkbox to activate the inventory block. The checkbox is selected by default. When deselected, the created inventory blocks cannot be applied when configuring function rooms for the property. |
|
Code |
A unique code for an inventory block. This is a mandatory field that allows users to configure. This field accepts a maximum of 25 characters. |
|
Name |
This is a mandatory field that allows users to configure a unique name for an inventory block. This field accepts a maximum of 50 characters. |
|
Reason |
This is a mandatory field that allows users to configure a unique reason for an inventory block. This field accepts a maximum of 50 characters. |
|
Description |
This is an optional field that allows users to configure a description for an inventory block. This field accepts a maximum of 150 characters. |
|
Start Date |
This is a mandatory field that allows users to select the start date of an inventory block. By default, the current property date is displayed. Users cannot select a date prior to the current property date. |
|
End Date |
This is a mandatory field that allows users to select the end date of an inventory block. By default, the current property date is displayed. Users cannot select a date prior to the current property date. |
|
Days of Week |
This is a mandatory multi-select drop-down list that allows users to select which days of the week the inventory blocks must be applied. |
|
Start Time |
This is a mandatory field that allows users to select the start time for an inventory block. By default, the start time is displayed as 12:00 AM. Users can configure the preferred start time. |
|
End Time |
This is a mandatory field that allows users to select the end time for an inventory block. By default, the end time is displayed as 11:59 PM. Users can configure the preferred end time. |
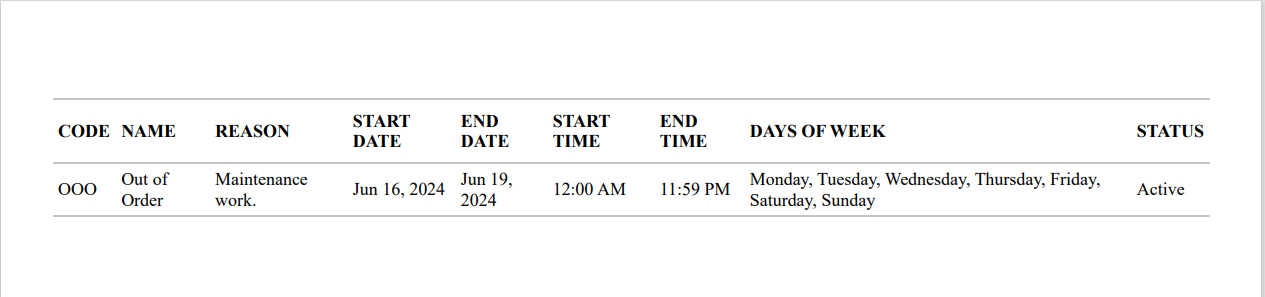
When users click Save, the inventory block will be saved and displayed in the Inventory Blocks tab. The details of the inventory blocks configured are displayed in the following columns:
-
Code
-
Name
-
Reason
-
Start Date
-
End Date
-
Days of Week
-
Start Time
-
End Time
-
Status
When no inventory blocks are available for display, the following message will be displayed: No data available. By default, only inventory blocks in the Active status are displayed. Users must select the Include Inactive checkbox to view the inactive inventory blocks. The Code, Name, and Reason columns can be sorted. Users can search for a record using the inventory block’s name and code.
To modify an inventory block, users must click the inventory block’s code displayed as a hyperlink in the Code column. When clicked, the Edit Inventory Block pop-up screen appears that allows users to modify the values of the following fields:
-
Name
-
Reason
-
Description
-
Start Date
-
End Date
-
Days of Week
-
Start Time
-
End Time
-
Status
Users can print the inventory blocks configured by selecting the preferred blocks and clicking on the print icon.
The print icon will be enabled for selection only when at least one inventory block has been configured.
Cancellation Policy
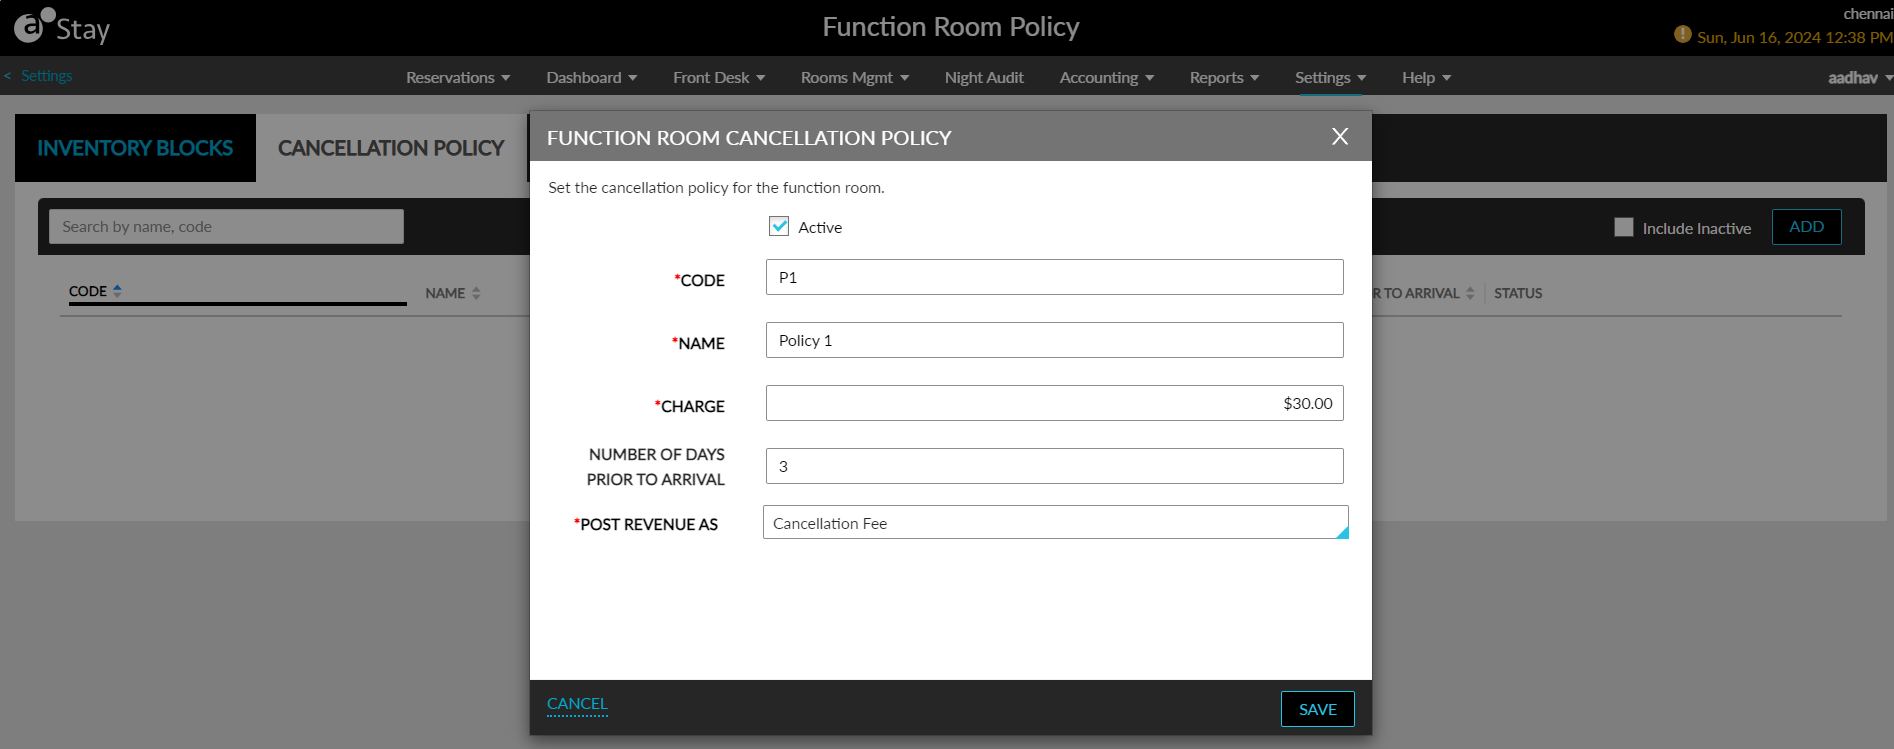
Users can configure cancellation policies for function rooms from this tab. The cancellation policies configured can be applied when guests cancel a previously booked function room at the property. To create a cancellation policy for a function room, users must click the Add button. When clicked, the Function Room Cancellation Policy pop-up screen appears that displays the following fields:
|
Field |
Description |
|---|---|
|
Active |
Select the checkbox to activate the cancellation policy. This checkbox is selected by default. When deselected, the policies created cannot be applied when configuring function rooms for the property. |
|
Code |
This is a mandatory field that allows users to configure a unique code for a cancellation policy. Users can enter a maximum of 25 characters. |
|
Name |
This is a mandatory field that allows users to configure a unique name for a cancellation policy. Users can enter a maximum of 50 characters. |
|
Charge |
This is a mandatory field that allows users to configure the cancellation fee for a policy. By default, the fee is displayed as $0.00. Users can configure a fee that is a maximum of 16 characters in length. |
|
Number of Days Prior to Arrival |
This is an optional field that allows users to configure the number of days prior to the arrival of a guest when a function room can be canceled. By default, the value is displayed as 0. |
|
Post Revenue As |
This is a single-select drop-down list that allows users to select the transaction item using which the cancellation fee must be posted. |
When users click Save, the cancellation policy will be saved and displayed in the Cancellation Policy tab. The details of the cancellation policies configured are displayed in the following columns:
-
Code
-
Name
-
Charge
-
Number of Days Prior to Arrival
-
Status
By default, when no cancellation policies are available for display, the message, No date available, will be displayed. Only the active policies are displayed by default. Users must select the Include Inactive checkbox to view the inactive policies.
All columns except the Status column can be sorted. Users can search for a record using the policy name and code. To modify a cancellation policy, users must click the policy code displayed as a hyperlink in the Code column. When clicked, the Edit Function Room Cancellation Policy pop-up screen appears that allows users to modify the values of the following fields:
-
Name
-
Charge
-
Number of Days Prior to Arrival
-
Post Revenue As